Derrick Gunter & Radiator Charlie Knew A Good Thing When They Saw It
By Tom Poland
Robert Clark and I were on the road running down a story, a story about land, a farmhouse, and tomatoes, a story of war, old ways, and survivors of sorts. On a hot, humid July morning we abandoned I-20 for Longs Pond Road and after a back road or two arrived at a farmhouse near the community of Boiling Springs. Two big blackjack oaks stood out front. Out back, a handsome, clapboard smokehouse looked lonely, its fellow outbuildings long-fallen comrades. “The other buildings were too far gone. We tore down the old cow barn in the summer of 2007,” said Derrick Gunter, the owner of this historic acreage in classic Sandhills Country.
Derrick grows heirloom tomatoes here in ancient sea bottom and he knows his history. (In fact, he teaches it.) Those trees of the Old South, blackjack oaks, almost never get much size to them, but Derrick’s did. He believes they may be the oldest blackjacks in the country. And you could say the trees know a thing or two about the Civil War. About thirty yards past the blackjacks, a low spot runs down Derrick’s property line on across Calks Ferry Road. As saplings, the blackjacks were standing when Sherman and his boys came through on the way to Columbia. Right near those trees Sherman and his troops bogged down in that low spot, a February rain-fed quagmire. The Union troops offloaded cannon balls and minnie [Minié] balls to lighten their load and better get through the morass. Several lifetimes later, Derrick’s grandfather found a cannon ball and “a shoe box full of minnie balls” alongside the road, a story that illustrates how much better supplied the North was than the South.
Another war came along and when housing construction exploded after World War II most homes were built of brick. The Hallman family built Derrick’s 1951 farmhouse with its German siding; it’s probably the last true farmhouse built in South Carolina. The house was built with cut nails and the walls were constructed with 4 by 6 un-planed studs. The house was built of about 90 percent heartpine.
“My dad got the property after a bachelor son died in 2004 and the house soon went to probate,” said Derrick. Derrick’s dad bought the farmhouse nine years ago. “I financed the reconstruction on the house and the land was gifted to me by my dad,” said Derrick.
Derrick began to work on the old home, whose interior sports handsome eastern white cedar tongue-and-groove paneling and real hardwood floors. The main room’s lacquer caramelized long ago when creosote in the chimney blazed up, roaring like a train barreling down the track.
Best Tomato I’ve Ever Eaten
The folks who sold the farmhouse to Derrick’s dad came up through the Depression. “They didn’t throw anything way,” said Derrick. “I threw away thousands of ties that wrapped loaves of bread.” Derrick and his dad had to make seven trips hauling off things like thousands of Duke Mayonnaise and peanut butter jars. They even found a 1920 receipt from Georgia for the Stuart pecan trees growing out back, $6.50 for six trees. Many folks who grew up in the Depression didn’t throw anything away. They had a mantra: “Keep something seven years, and you’ll find a new use for it.”
Derrick’s dad gifted him some land adjoining the farmhouse and that led to a decision. How best to spend summer days. Derrick teaches U.S. History at White Knoll High School. He has his summers free. “You’ve got all that time off in the summer,” said his mother, “why don’t you grow peanuts?”
“The land was cleared before I moved into the farmhouse during 2009. That was before I got married. In 2011, I was questioned about growing peanuts. I researched heirloom tomatoes and planted them instead. Then his dad passed along some sage advice. “Don’t grow peanuts. It’s a lot of work and will drive you crazy. Grow tomatoes,” he said remembering a Russian heirloom tomato a neighbor up the road had brought them. Derrick knew the tomato his dad was referring to. He had made a sandwich from it. “Best tomato I’ve ever eaten.”
That Russian heirloom? It’s called a “Black From Tula.” It’s a big “black” tomato with 3- to 4-inch, slightly flattened, oblate, dark brown to purple fruit. It has deep green shoulders. Its flavor is heavenly, rich, slightly salty, with a smoky-fruit flavor. Another popular heirloom is the Marion, developed by the Clemson Extension Service in 1963. “Old timers love it,” said Derrick.
Radiator Charlie
Derrick started out with 20 plants, a test run featuring eight varieties. Four failed but four did well. History enthusiast Derrick forged ahead. “When my son Jackson Lee—I named him after Robert E Lee and Stonewall Jackson, whom I consider the best two generals in American history—was born in 2013, it didn’t deter my expansion of growing tomatoes. Farming was foreign to my wife since she grew up Rock Hill but she has adjusted quite well to this kind of life.” Today, Derrick grows mainline varieties with names as colorful as they are. Cherokee Purple, Black Krim (Crimean), German Johnson, a pink tomato, and the most colorful name of all, Radiator Charlie’s Mortgage Lifter.
“Radiator Charlie,” said Derrick, “owned land. That was the only thing he had. He had ethics and common sense but no education. He had will power and made a success of himself.” Radiator Charlie’s story is one of more than making do, of finding a way not just to survive but prosper. In the early 1930s, Marshall Cletis Byles was going through a tough time in his hometown of Logan, West Virginia. He ran a small repair shop at the bottom of a mountain, a good location, for the mountain was famed for overheating trucks, sending them steaming and hissing back down the mountain. He got a lot of business from trucks that never made it to the top, thus the moniker “Radiator Charlie.”
The Great Depression was making its presence known and Byles decided to develop a large tomato families could feast on. Though he had no training in plants he knew what he liked. He started with a German Johnson, Beefsteaks, an unknown Italian variety, and an unknown English variety. He grew plants from each variety and planted three Beefsteaks, three of the Italian variety, and three of the English variety in a circle. In the center, he planted the German Johnson.
Using a baby syringe, he cross-pollinated the German Johnson with pollen from other plants in the circle. He saved the seeds and planted them the next year. He selected the best seedlings and planted them in the middle of a circle, surrounded by the other seedlings. He repeated this strategy for six years, cross-pollinating the strongest plants in the center with pollen from plants in the circle. He ended up with a pretty good tomato and sold the seedlings for $1.00 each, a nice sum in his day. People drove hundreds of miles to buy his seeds. And here’s why. Radiator Charlie’s Mortgage Lifters are red and pink, amongst the most flavorful heirloom tomatoes, and big, averaging 2 to 4 pounds. They bear fruit in about 80 days, are perfect for slicing, and produce an abundant crop. On top of that they resist disease and produce until frost does them in. Radiator Charlie, unlike all those trucks, climbed a mountain of his own and ascended to legend. Growers like Radiator Charlie and Derrick Gunter free you and me of red, perfect, tasteless grocery store tomatoes.
The Nurturing Cycle
Most American heirlooms trace their heritage to the mountains of Tennessee, North Carolina, Kentucky, Virginia, West Virginia, and Ohio. Yes, Ohio has mountains. They do well in these areas because of the climate. Down here, heat and humidity are heirlooms’ enemies. Derrick’s do well he says because “I nurture them.” That he does. You can make the case that the cycle of nurturing starts with the preparation of seeds, but we’ll discuss that last. Let’s start with planting.
In spring, he puts in twenty hours a week. He digs holes, plants, and lays down mulch. He prefers rye or wheat straw for mulch. Such mulch really cuts down on weeds. He gets his mulch from Stanley Shumpert, Lexington County’s last dairy farmer and his uncle.
He grows plants organically, though he points out that he isn’t “certified organic.” He plants marigolds as a natural pesticide. “I haven’t used any insecticides at all this year,” says Derrick. Marigolds deliver other bonuses. They attract beneficial wasps and pollinators and repel deer and nematodes.
He uses fish fertilizer on the plants. With the heavy lifting behind him, Derrick works six and a half hours a week during the growing season. When he’s ready to plant them he rinses them in water with just a touch of bleach to kill any pathogens present. A week before Valentine’s Day he puts the seeds in “grow soil” beneath grow lights. “After a month, they go into bigger pots,” said Derrick. “The first of April they can go into the soil.” Derrick plants one variety per row. Tomatoes are self-pollinators. Each plant has both sexes needed for pollination. Isolating tomatoes can reduce cross-pollination but wind and bees will still cross-pollinate them.
Now comes the growing season, the nurturing season’s apex when rain is a blessing, a time that makes many a kitchen a better place, a time that makes restaurant owners happy. “Naturally, one to two inches of rain per week is preferable,” said Derrick. “However, that’s not usually the case. If you are going to water your plants, it’s best to use a slow drip system. I avoid directly watering the plants from the top. That speeds up fungal problems.” He passes a tip along for us would-be growers: “It’s better to underwater than overwater.”
All the nurturing produces vines bejeweled with tomatoes of varying colors result, not the monochromatic red so prevalent in non-heirloom varieties. From these not-so-round heirloom tomatoes come savory flavors. Among them, Derrick seeks the progenitors of next season’s plants.
“I go to the middle of the row and pick out the biggest, healthiest tomatoes for seeds. Once he collects the seeds, he puts them in a cup of water in a jar. He shakes it to break up the gel that coats the seeds. The next step is to place the seeds on paper towels where they dry. When they’re good and dry, into the refrigerator they go until planting time. That’s when the real fun begins for those who love a classic sandwich thick with slices of summer’s savory heirloom tomatoes slathered with Duke’s mayonnaise.
“An heirloom tomato,” says Derrick, “is a heritage variety that has been lost to hybridization that’s red, round, “perfect,” and tasteless. This prompts Derrick to quote the late Andy Rooney. “The federal government has sponsored research that has produced a tomato that is perfect in every respect, except that you can’t eat it.”
Heirloom tomatoes serve up a lesson about people. In our image-crazed society, pretty people generally get a lot more attention than they deserve, sort of like round, red, perfect tasteless tomatoes. How easily we overlook what really matters. Plain people, often relegated to the background, quietly go about their business making the world a better place.
As for Derrick Gunter? Well, he made a good decision when he chose to plant heirloom tomatoes, not peanuts. Consider him a bit of a preservationist. “The benefit of the heirloom is remembering the past and securing the future,” said Derrick. “When you’re dead and gone, your family can enjoy the exact same thing you enjoyed. We as a society, by preserving our heritage produce in a fast-changing world, give others a never-changing world. Something that stands the test of time.”
 Derrick Gunter’s Tomato Sandwich Recipe
White Sunbeam Bread
Duke’s Mayonnaise only
Any fully ripe pink or black or mixture heirloom tomato
Salt & Pepper
Armor Brand Dried Beef
Derrick Gunter’s Fried Green Tomatoes Recipe
Any green tomato
Salt for 45 minutes to draw water out
Slice average thickness
Sprinkle with salt
Coat with mix half self-rising flour and half fish fry mix
Fry in vegetable or peanut oil
 About the Author: Tom Poland’s work has appeared in magazines throughout the South. Among his recent books are Classic Carolina Road Trips from Columbia; Georgialina: A Southland, as We Knew It; and Reflections of South Carolina, Vol2. Swamp Gravy, Georgia’s Official Folk Life Drama, staged his play, Solid Ground. He writes a weekly column for newspapers and journals in Georgia and South Carolina about the South, its people, traditions, lifestyle and changing culture and speaks to groups across South Carolina and Georgia. Tom grew up in Lincoln County, Georgia, and graduated from the University of Georgia. He lives in Columbia, South Carolina, where he writes about “Georgialina” – his name for eastern Georgia and South Carolina.
This article is also a chapter in Tom’s recent book, “South Carolina Country Roads: Of Train Depots, Filling Stations & Other Vanishing Charms,” which can be purchased on Amazon.com.
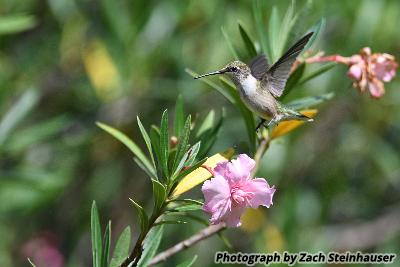 If you haven’t seen them already, it’s definitely time for hummingbirds to appear in South Carolina. Thousands migrate north from Florida, Mexico, Texas, and South America, some tracking as far as Ontario. According to Clemson University, mid-March was the arrival time for the Ruby-Throated Hummingbird, the most prominent species that we see in the Midlands. Watching these beautiful, tiny creatures fly to and from feeders and plants is simply mesmerizing and most certainly a sign that spring has arrived!


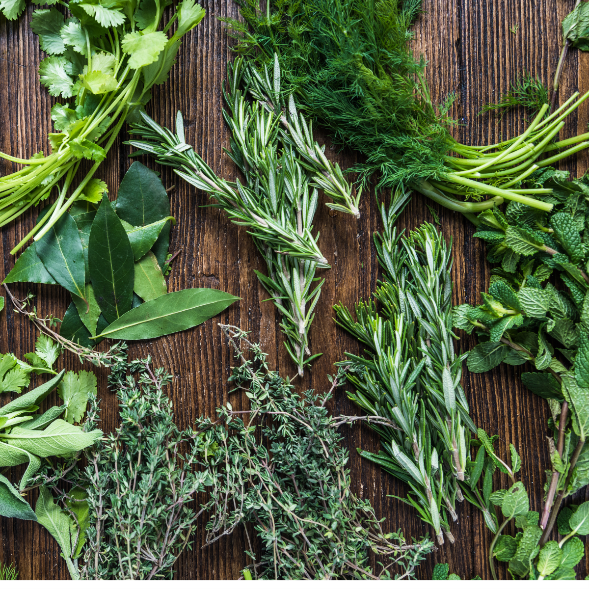 Plants used for the medicinal, savory, or aromatic quality of their roots, leaves, green stems and flowers are considered to be herbs. Practically every culture around the world has a history of some type of herb use. Chinese herb books date from about 2700 B.C. and include extensive lists of medicinal plants. Italy, India, and Thailand are well known for using herbs in cooking. The Greeks and Romans crowned their heroes with dill and laurel. Regardless of the desired usage, growing and harvesting herbs is easy and rewarding. They can be grown in small spaces or containers, intermingled among vegetables and/or flowers in the garden, or even indoors. Herbs are low maintenance plants, being naturally resistant to diseases and pests.
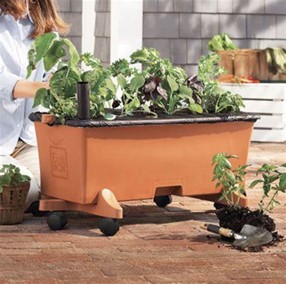 EarthBox Gardening Kit:
 SIZE – Start Small! Better to have a small garden with fewer weeds to control, than a larger one. A 10’ x 10’ is a good size for a beginner in-ground garden. Researching space requirements for each of the vegetables you intend to grow will help you determine how many plants you will need. This info is available on the seed packet or plant tag. If you prefer a small-space garden, there are many options such as Earthboxes, Raised Bed Kits, and Pottery/Container Gardens. You will be surprised by the quantity of plants that can be accommodated per square foot.
 SOIL – Other than water, soil is the most critical element in how well your garden grows! Nutrients and drainage are key. To identify deficiencies, have your soil tested through the local Clemson Extension office. Stop by our Check-Out and we will assist you in processing an application and provide sample bags. Drainage issues are likely in areas of clay soil; a raised bed garden will provide a better growing medium in clay. Raised bed, Earthbox, and container gardens can achieve perfection as far as soil is concerned. The best soil and compost is available to purchase and gives you an edge on success. An in-ground garden is going to need a little more help, so add soil amendment and compost to provide valuable nutrients and improve drainage. Click
  Now, for the FUN part….PLANTING –
  As you anticipate the feast of your harvest, don’t get side-tracked and forget that
  Call the Police! A MURDER has been committed…CRAPE MURDER, that is! You’ve seen them around town, with the huge knots and multiple shoots becoming a mass on each branch. Don’t let your beautiful Crape Myrtle be a victim of this pruning crime. The natural shape of these southern landscape specimens, when pruned improperly, is lost!
 Important Tips to Follow:
 An added extra for planting citrus in a pot is that you can ensure good, rich, soil. Transplant to a larger pot as it grows – don’t allow it to become root bound. Citrus are heavy feeders, so you will need to be diligent about fertilizing. We recommend Daddy Pete’s Sea & Farm Potting Soil, mixed with a little Stout Ollie Compost (the best organic nutritional additive ever). Fertilize 3 times/year with Espoma Citrus-tone (organic).
 As the weather warms up and especially during the hottest days of summer, more frequent watering will be required. Soak it when you water, but allow the soil to dry out in between watering. When top 2 inches are dry, it’s time to water. Avoid keeping the area around the trunk wet and NEVER allow plant roots to sit in water. Allow for good drainage by using Pot Pads underneath the pot to lift it off the ground. These are available in Wingard’s Gift Shoppe.
 It’s a common question we get this time of year! In fact, a customer sent us this picture.
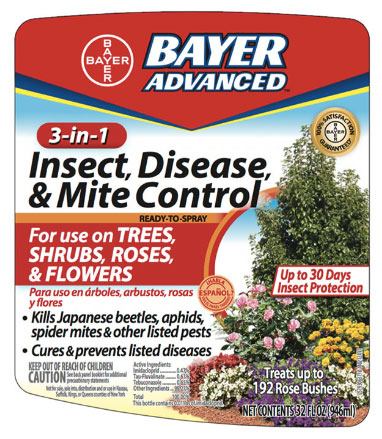 You may have seen some beetles munching on your roses or crape myrtles or a variety of other flowering plants. These are Japanese Beetles, and they arrived a little late this year, since we had such a cool Spring. Japanese beetles feed mainly on flower buds or open blossoms, but can feed on leaves. Since many beetles feed mainly at night, the gardener rarely sees them, only the damage that they cause.

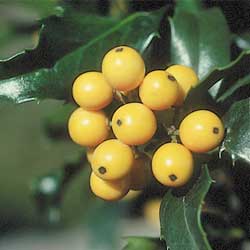 Plants with berries add winter interest to the garden and also attract many different types of birds. But which berries are best for your yard, and how can you ensure a bountiful buffet for your feathered friends to enjoy?
 Spring bulbs faithfully reappear at the most advantageous time – after a long, cold winter, just when we’re longing for bright colors to relieve the monotony of winter snow and ice. Most spring bulbs are perennial and multiply in number every year, bringing more beauty to the flowerbeds each spring, but some problems can destroy a carefully planted bulb bed. Seemingly carefree, bulbs do require a bit of nurturing to ensure they perform their very best for years to come.