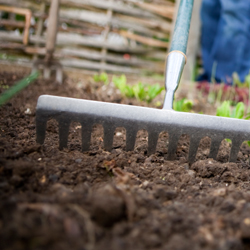
Although many gardeners plant trees and shrubs in the spring, knowledgeable gardeners plant in the fall to take advantage of all this fabulous season has to offer. But why is fall planting better than spring planting?
Stress Reduction
Transplanting causes stress as plants are removed from containers, balls or established locations and changed to new locations. Planting in the fall, when a plant is entering dormancy and is generally hardier and sturdier, reduces this stress so the plant can thrive.
Establishing Strong Roots
Fall planting “establishes” trees and shrubs by encouraging root growth. Because the soil is still warm, the roots continue to develop until freezing, though the upper parts of the plant are already dormant. When transplanting in the spring, the developed roots are active and delicate tips or rootlets, as well as buds and new leaves, are more easily damaged.
Weather Resiliency
Trees and shrubs planted in the fall are better able to withstand the rigors of the next summer’s heat and dry conditions because they have much longer to develop healthy roots systems and become thoroughly established. This is especially critical in dry climates or areas prone to drought or irregular rainfall.
Faster Maturity
The “head-start” of fall planting results in a larger plant in less time, helping create a mature landscape without waiting for smaller plants to catch up. This can be especially critical when replacing dead or damaged plants in a mature landscape to avoid a gap or uneven look.
Water Conservation
Planting in the fall saves watering time and promotes conservation by eliminating daily watering. Cooler temperatures with the addition of both morning and evening dew contribute greatly to soil moisture availability in fall without as much supplemental watering.
Color Confirmation
Fall is the best time to see a plant’s autumnal color. Planting in the fall eliminates the surprise of the wrong color or unexpected shades that may not coordinate with nearby plants. By planting in autumn, you’ll know exactly what you’re purchasing and planting, and you will be able to match better with your existing landscape.
Autumn can be the ideal time to plant trees and shrubs, whether you are adding to your landscape, replacing plants or starting a whole new look. If you plant in autumn, you’ll be amazed at how lovely your landscape will look next spring.
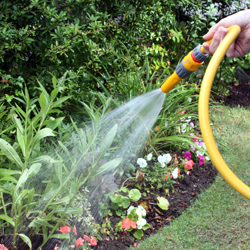
Water is critical for a healthy garden and landscape, but how much water is too much, how much isn’t enough and how much is just right? Unfortunately, there isn’t a specific answer that suits every gardener’s needs. All plants have different water requirements, which change depending on the type of soil, amount of sun, temperature, humidity, season, maturity of the plant and overall growing environment.
Initial Watering
All plants, including specimens described as drought tolerant, will require water when first planted. This is because many of the smaller roots responsible for water uptake are usually damaged during shipment and planting. Build a small circular soil wall around the plant to contain water while it percolates into the soil. Watch new plants carefully and keep them well-watered as their roots settle in and they adapt to their new or transplanted location.
Groups Are Good
It’s a good idea to have some knowledge of the plant’s water requirements when determining the location in the garden. It will keep watering simple if you plant a new specimen near other plants with similar water requirements. In this way, there is no need to readjust an irrigation system or watering schedule, since all the plants in the group have similar needs.
Need a Drink?
Because plants’ watering needs can change through the season, how can you tell if a plant needs more water? Most plants will wilt as the soil becomes too dry. The leaves may droop, and if it’s an upright plant, the top ends may become soft and bend over. Glossy plants may begin to look dull, while thick leaves will shrivel. If you notice these signs, it is time to water! Most plants will revive if watered quickly enough, but be sure to water deeply rather than allowing moisture to run off the surface.
How can you tell if you should water? Push your finger into the soil an inch or two from the base of a plant. Perfect soil should feel cool and slightly moist. Some soil should stick to your finger. If none does, it’s too dry. If it’s muddy, don’t water. Overwatering kills plants by depriving the roots of oxygen. Some gardeners use water meters to see the precise amount of moisture. If you’re unsure, this tool can be helpful.
Adjusting Your Watering Schedule
The amount you have to water your plants or landscape can change from day to day. A cool morning will allow more dew to form and drain to the soil, or a sudden afternoon thunderstorm can be enough water to keep your plants hydrated for a few days. An overly hot day, however, can rapidly deplete water resources and extra watering may be required. Check your plants and landscape regularly to be sure they are getting adequate water, and make adjustments as needed to keep them suitably moist without either too much or too little water.
How MUCH water?
Established lawns require approximately 1 inch of water per week in the summer. Put several
containers out on your lawn and put a mark at a depth of 1 inch. Then turn on the irrigation. Determine
how long it takes to fill the container to the 1 inch mark. Divide the time by 4 and set the zones to run that
amount of time every other day starting at 5:30 am. Keep an eye on the lawn as some zones may need
more or less water due to the soil’s ability to drain.
New lawns – follow the instructions by the installer, or the place of purchase.
Trees or shrubs (3 or 7 gal) installed within the past six months – Each plant will need about 1 inch
of water a day when daytime temperatures are 90 degrees or higher. (Even more if temperatures exceed
100 degrees.) You can use the same container method explained above to determine how long it takes
your irrigation system to put out 1 inch of water. You will need to water for that amount of time every day.
Trees (15 gal) installed within the past six months – Take a 5 gallon bucket and put a hole on the side
near the bottom using a 1/16 inch drill bit (approximately the diameter of the lead in a #2 pencil). Fill it
with water daily, and it will slowly trickle out. Put a brick in the bucket so it doesn’t blow away when it is
empty. For larger trees, use more buckets.
Remember to reduce the water when our high temperatures decrease as we go into the Fall.
If the temperature high is in the:
80’s – water every other day
70’s – water every 3rd day
60’s – water every 4th day
50’s – water once a week
These are some general rules, but not an absolute answer to irrigation of a lawns, trees, and shrubs due
to natural rainfall, soil variables, slopes, drainage, and other issues. Every location is different. Watch
how your plants respond and adjust accordingly.
You can bring the bright atmosphere of a tropical vacation into your home with indoor plants. An integral part of your home décor, indoor plants not only artistically improve your home, they also cleanse and freshen your indoor air quality. Plants take in carbon dioxide and release clean, pure oxygen. Some plants even absorb certain air toxins, potentially harmful radiation or unpleasant smells. Indoor plants also add welcome humidity to the air we breathe, and filter dust particles for a cleaner environment. While indoor plants can improve your life in many ways, they must be selected to fit successfully into your lifestyle.
Don’t Consider Light Lightly
When selecting a foliage plant, first determine what type of light you have – this will be the best key to the plant’s health and survival. Look at the area where you would like to keep the plant through the entire day to determine if the light changes. You will also want to keep in mind the time of year – the light will change with different seasons as well as the angle of the sun.
Low Light – 3-4 hours of indirect light. Don’t confuse this type of light with no light. If you can sit in the room and read comfortably without turning on a light, it is low light. If you must turn a light on, then it’s considered no light.
Medium Light – 4-6 hours of indirect or direct morning sun.
High Light – Direct or indirect sun for 6-8 hours a day. Direct afternoon sun in the winter can be too hot for many houseplants. Be careful this time of year because many plants can get sunscald.
No matter what the light levels in different rooms of your home, there are plants that can be comfortable there. The best rule of thumb is to give your indoor plants the most light you possibly can. If you are short on natural light, try some of these plants which are more tolerant to low light conditions:
Pothos
Philodendron
Snake Plant
ZZ Plant
Arrowhead Vine
Chinese Evergreen
Dieffenbachia
Peperomia
Peace Lily
Rubber Plant
Bromeliad
Maidenhair Fern
If you aren’t sure what your light may be or which plants may thrive, we also recommend you talk to one of our experts about your particular situation for best results.
A Word About Watering
The most common cause of death of an indoor plant is overwatering. The second most common cause is underwatering. So it’s important that you watch out for the watering needs of your indoor plants.
The smaller the pot, the more frequently you will need to water your indoor plant. Small pots (2-3 inches) might need water every day depending on the plant’s needs and the richness of the soil. A 4-6 inch pot may need water every 3-4 days, whereas a 10-inch pot (or larger) usually only requires water every 4-6 days. These guidelines can change depending upon the location of the plant, the type of pot, variety of plant, soil condition, general humidity, time of year and weather conditions. Plants don’t utilize as much moisture on gray days as they do on sunny days. Plants that prefer drier conditions may need to be watered only every two weeks.
Because so many factors can impact indoor plant watering, determining the watering schedule for large pots (over 10 inches) can be difficult. To help, take a natural wooden dowel and push it into the soil until it reaches the bottom of the pot. After you pull the dowel out, you will be able to see the wetness on the bottom of the stick (if there is any). Also, remember that the larger the pot, the more water will be held in the soil at the bottom – even if there are drainage holes.
Plants that have lower water requirements:
Sago Palm
Snake Plant
Orchids
Ponytail Palm
Succulents
Spider Plant
ZZ Plant
Red Aglaonema
Pothos
Rubber Plant
Despite their water requirements, most all indoor plants grow naturally in the tropics. Therefore, they appreciate a humid environment, which most homes do not provide. Home heating systems can be especially drying in the winter. Keep a hand held mister close by and give their leaves a spritz every now and then. It wouldn’t hurt to do it every day. Keeping bowls or trays of water near your indoor plants is also helpful. As the water evaporates, it puts more moisture into the air around your plants.
Fertilizing
Most foliage or non-flowering houseplants will thrive with occasional fertilization. You can increase the feeding to twice a month during the growing season. Flowering plants have different fertilizing needs depending on their bloom schedules and growth productivity. You can find fertilizers specific to certain indoor plants, such as African Violets and Orchids. Investigate the needs of your individual plants and feed them appropriately. Use a general indoor plant fertilizer and follow the instructions on the package.
Houseplants can add great beauty and many benefits to your home. Once you begin choosing houseplants, you’ll soon be enjoying them in every room and every season.
No yard or landscape should be without a crape myrtle, or two, or three or… many! How wonderful to have something that blooms so profusely during that time of year when most other plants are looking tired and worn from the summer heat and drought. The versatility of this plant makes it suitable for many types of yards and many uses, and once established, they will go on to add charm and delight to the landscape for many years.
About Crape Myrtles
Crape myrtles bloom in late summer and can be found in flower colors of pinks, lilac, white, reds and purples. Requiring very little maintenance once established, crape myrtles need a full sun location to thrive and they do not like wet feet. Keep these needs in mind when selecting a site to plant them. They will require some supplemental watering for the first year or so to get off to a good start and develop good roots. Crape myrtles are also pretty much pest-free, except for aphids on occasion and these are easily controlled with an insecticidal soap spray. Some varieties are more susceptible to powdery mildew than others but most of the newer varieties are more resistant to this fungus problem.
Planting Crape Myrtles
Although tolerant of a wide range of soil qualities, crape myrtles grow poorly in wet locations so be sure to select a well-drained planting site. Late spring to early summer is the best time to select and plant your new crape myrtles while they are actively growing and can settle in quickly. Plant at or slightly above ground level, spreading the roots out slightly and using mulch to protect and shelter the roots after planting. They do prefer a slightly acid soil.
Crape Myrtle Types
Crape myrtles can be found in shrub, multi-stem tree and single trunk tree forms. For best results select a cultivar whose growth characteristics and ultimate mature size fit your intended use. Planting a shrub- or tree-like crape myrtle in an area of limited space will require yearly pruning to keep it from outgrowing its place. Severe pruning distorts the beauty of the Single- or multi-stemmed tree-form crape myrtles are ideal as flowering specimen trees or as small, flowering shade trees near patios, walkways and entrances.
Pruning Crape Myrtles
If you plant a cultivar whose growth characteristics and ultimate mature size fit your intended use, little pruning will be required. Don’t plant a variety that grows 25 feet tall, if you want a tree that will max out at 15 feet tall.
If adequate room is provided, little pruning is required except to maintain shape or remove any dead or crossing branches. Remove any suckers or water sprouts to maintain tree forms and elegance. Blossoms are produced on new growth so you can prune anytime the plants are dormant through the winter. For Wingard’s own “How To” video on pruning crape myrtles, click here.
With so much to love about these plants, there’s no reason not to add one to your yard this year! And next year, and the year after that, and the year after that…
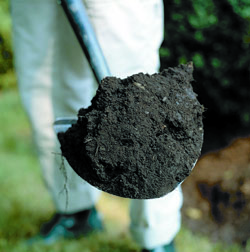
How well do you understand your soil? It’s more than just dirt, and the more you learn about soil, the better you’ll be able to care for it to ensure a stunning landscape, healthy lawn and productive garden.
Soil is often referred to as the “foundation of life.” The foundation must be strong and healthy before great things can be developed. We are blessed with two types of soils in Lexington County: clay soils and sandy soils. Both of the soil types need some extra help when we are trying to grow vegetables, flowers, turfgrass, shrubs and trees.
All About Soil
All soils are comprised of air, water, minerals, living organisms, and soil particles. The soil particles are sand, silt and clay. The percentage of these particles make up the soil’s texture which is important to overall soil and plant health as it relates to soil “porosity”, the pore spaces where water and air reside. Of course we all want loam – that rich, vibrant soil thriving with beneficial bacteria and with a smooth but crumbly texture ideal for root growth. Most of the time the particles are not balanced, but amendments can be added to improve soil health and create that loamy soil where plants thrive.
Improving Soil
Improving soil is actually quite easy. All soils are improved by adding minerals and organic material that help balance out the overall components of the soil’s structure.
Soil Testing
The first step in improving the soil is to take a soil sample test. For spring plantings and maintenance applications take the samples in early winter in order to give you ample time to plan and apply any nutrients that may be needed. The soil samples are analyzed in a laboratory to indicate the levels of nutrients in your soil, the report will tell you the pH value and it will make a recommendation for the amount and type of fertilizer and/or lime you need to add to the soil for optimum plant growth. Using the results of the soil test allow you to apply the correct amount of fertilizer for your specific needs.
How to take a soil sample
To have a soil analysis done you need to collect 8 to 10 or more core samples, which will be combined as one composite sample. The composite samples should include soil from the surface to a depth of 6 inches in all areas, except for lawns where core samples should be taken from a depth of only 2 to 4 inches. A simple garden trowel can be used to collect the core samples. Place the core samples in a clean plastic bucket and mix them thoroughly. Keep sampling separate from areas that have been fertilized or limed differently, such as lawns, shrub beds, and vegetable gardens. These should be submitted as separate composite samples. It is imperative to use clean sampling tools. You can obtain a soil test bag from Wingard’s or the Clemson Extension office and fill the bag to the fill line indicated on the bag. Be sure to keep track of which part of your yard, landscape, or garden the sample represents. Take the soil sample to Wingard’s or the Clemson Extension Service office. The charge is 6 dollars per sample. It is recommended to soil test every year.
Understanding your soil test results
Within 7 to 14 days the results will be emailed or mailed to you. Your soil analysis will have the soil pH value and a bar graph representing the amount of soil nutrients found. It will have a section at the bottom of the first page which shows how much lime (if needed) to add for each 1000 square feet and refer you to specific comments on the last page. The comments section will tell you what type of fertilizer(s) you need, how much you need and when to apply it. Feel free to bring the sample report by Wingard’s for assistance in reading the report.
Amending the soil
Adding organic matter is a great way to improve the health of both sandy and clay type soils. Organic matter refers to plant or animal materials decomposed into compost or “humus.” Organic material aids in moisture holding capacity, aeration of the soil, provides beneficial microbes and bacteria all of which improve nutrient uptake for the plant. Materials like composted cow manure (Black Kow), Stout Ollie Compost, and Mushroom Compost are excellent amendments for your soil. These materials can be incorporated into the soil through mechanical or manual tilling of the soil to a depth of 4 – 6 inches.
For sandy soils we recommend Daddy Pete’s Planting Mix as an organic amendment. This organic mixture is suitable for flower and vegetable gardens, backfilling shrub and tree plantings, and for general landscape needs. Daddy Pete’s Planting Mix is a mixture of Daddy Pete’s Composted Cow Manure and premium aged pine bark fines.
When planting shrubs in clay soils we recommend mixing Soil Conditioner/Enhancer in the backfill to add organic matter and loosen the clay particles.
The Magic of Mulch
Mulching is a simple way to add biodegradable materials to the soil. Pine needles, tree leaves, lawn clippings, bark, chicken manure, etc., can be worked into the soil to decompose. This process improves the air spaces between the soil particles and rearranges the sand, silt and clay to produce optimum soil structure, improving the water retention and drainage balance and making nutrients available to plants.
ONE LAST THING
Use Natural Guard organic fertilizers made with Jobe’s Biozome, a unique and proprietary blend of beneficial microorganisms. These microorganisms break down complex materials and minerals to improve long-term soil quality, helping roots grow and plants to absorb nutrients they need. Jobe’s Biozome naturally re-establishes a balance between plant and soil. When soil has proper structure and sufficient nutrients for healthy plants, optimum health has been achieved, and great soil will lead to great landscaping, turf and gardens. Congratulations and keep on growing!
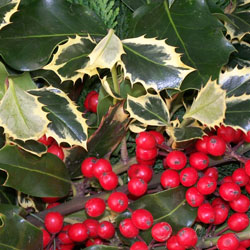
Fresh cut greens – pine boughs, holly sprigs, mistletoe, magnolia leaves, juniper, etc. – are wonderful for winter and holiday décor, both indoors and out. Extend the life and enjoyment of your fresh greens by following these easy steps:
SOAK – Immerse greens in cold water overnight or up to 24 hours. The needles will soak up moisture to stay plump and firm. A good location for accomplishing this task is in a utility sink or bath tub, but be sure the water won’t freeze while the greens are soaking. Use only fresh, plain water without any additives or chemicals.
DRY – Allow greens to drip dry for an hour or so in a well-ventilated area out of direct sunlight. This will remove excess water from the branch ends so they do not leak.
SPRAY – If desired, spray Wilt-Pruf, an anti-transpirant, on greens when they are finished dripping. This will seal moisture into the needles extending the life of your greens. Note that this product may change the color of blue-colored cut greens like Carolina Sapphire or Blue Juniper. Test the spray on an inconspicuous area first to be sure you don’t mind any changes.
DRY – Allow the greens to dry thoroughly after spraying and before decorating and hanging or arranging. This will be sure there are no water spots on any of your bows, accent pieces or ornaments that are part of your fresh arrangements.
COOL – Keep greens in as cool a location as possible, out of direct sunlight and away from any heat source, including heating vents, ceiling fans and air ducts. Moving arrangements of fresh greens onto a cool porch or into a garage each night can help extend their vibrancy.
BUNDLE – Arrange your fresh greens in dense bundles and bunches, either as wreaths, vase arrangements or swags. As a group, they will help keep each other fresh with slightly higher humidity between each green.
CLEAN – Keep fresh greens crisp and clean through the holiday season by dusting them lightly. Use only a clean, lint-free cloth without any sprays or chemicals. This will remove dust that may dim the arrangements, but chemicals could damage the greens or change their colors. Do not brush the greens so harshly that you may damage or dislodge their needles, foliage or berries.
With proper care, your fresh cut greens can be stunning holiday decorations for several days or weeks, bringing a touch of nature into your home even when the world outside is cold and dreary.
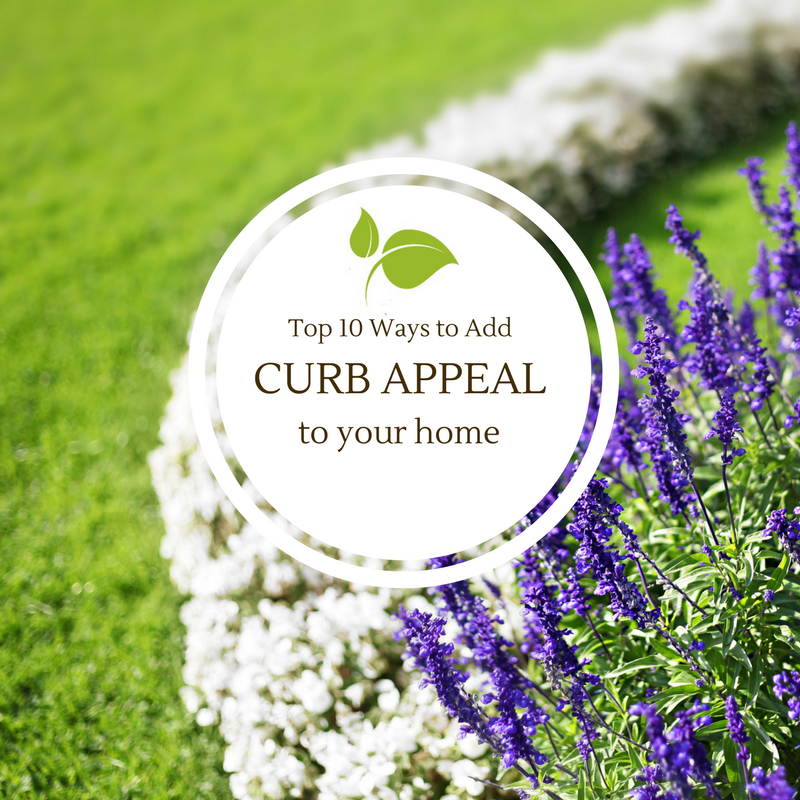
Curb appeal is that undefinable something that draws you to a home at a glance. It is a combination of visual charm, good upkeep, and attention to detail. And often will be the thing that makes you the envy of the neighborhood.
Here are 10 ways you can add great curb appeal to your home:
Surround your property with fencing
Fencing for your yard is needed to keep wildlife from eating the nasturtiums, but it also provides a quiet oasis to enjoy the beauty of your outdoor space. Fencing can be six-foot high cedar that blocks traffic noise, or it can be white wicker that is only tall enough to delineate the perimeter of your property.
Don’t leave your landscape in the dark
Think about accent lighting highlighting your prize plantings. Patio lights can be judiciously used to make your gazebo comfortable for a late evening get together with friends. Insect zapper lights get mixed reviews since they can be noisy as the insects are incinerated. They also tend to have a harsh brightness that is annoying to some. On the positive side, outlining pathways with small lights prevents stumbles in the twilight.
Lawn furniture
Spending a lot of time just relaxing and enjoying the sights, sounds and smells of a flower garden can be done from a gazebo with sturdy and comfortable garden furniture. Tables, chairs, lounges, and footstools are obvious choices for furniture in the garden area. A grill or barbecue unit located nearby means guests can enjoy the space while grilling fresh produce from the garden. Corn on the cob from the vegetable garden can’t get any fresher.
Plan garden beds
Many gardens would be beautifully accessorized by adding carefully chosen raised garden beds. Look at the style of your house and design the garden plots for pansies or potatoes in garden beds that enhance the look of the house. For example, if your house is split level suburban, why not add a couple split level beds.
Few projects add as much charm and color to a house as flowers in window boxes.
Build your own window box or buy one from a garden center. Use a plastic liner to prolong the life of the planter and simplify fall cleanup. Easier yet, arrange container gardens in pots and planters on the front stoop or along the walkway.
Simple changes make the biggest impact – the $10 idea!
If your mailbox is old, replacing it will instantly change your curb appeal for the better. Mailboxes are relatively inexpensive, and there are many ways that you can make yours look better. If you don’t really want to part with your old mailbox, you could just give it a fresh coat of paint.
A fresh coat of paint on garage doors will instantly make your exterior look better. Garage doors tend to get dirty and faded from all the up and down movement and should probably be repainted every few years.
Replacing hardware on your mailbox, house numbers, doorbell, door knocker, entry light and door handle will make a huge improvement to the look and feel of your home.
Get a little daring, and paint the front door red or blue.
Make pathways interesting
A planned landscape that has permanent beds can also have interesting and decorative pathways. Think about using colored aquarium pebbles with a seashell motif for edging. Try pathways that meander according to your planned beds rather than sticking to straight lines. Maybe you would like to have a yellow brick road as a pathway in your garden.
Choose colorful or whimsical containers
If a large garden is too much to manage in your free time, or if you are working in limited space, think about establishing your garden in unusual containers. Or, such containers can be simply an interesting accessory to the real garden. Colorful ceramic pots in large sizes and shapes can be placed randomly amongst the flower beds to hold herbs or a salad or two. An old claw-footed bathtub or a little red wagon both make great containers for garden plants.
Even add a bit of your own personality with a garden flag that offers a warm welcome to your visitors and can be changed out with the seasons.
Add Color
You can add color to the plants that you choose or by the containers you pick for spots of color. Look for ways to make color spots show up even better by putting them against contrasting background of other plants, walls or trellises.
Plant a tulip border in the fall that will bloom in the spring. Dig a flowerbed by the mailbox and plant some pansies. Place a brightly colored bench or Adirondack chair on the front porch.
Delight the wee folk
Adding whimsical statuary or ornaments to your garden plots can be fun and useful as well. Garden gnomes, leprechauns and perhaps even a fairy or too can be an adventure to undertake with your child or grandchild. A ceramic frog by a garden pond is a common sight around gardens, but have you ever seen a dragonfly or a small fire-breathing dragon. Choose a copper weather vane or a birdhouse decorated like a fairytale castle.
Five senses
A well-planned landscape with carefully chosen accessories will be a delight to all five senses. You see the beautiful colors in the plants, flowers, and accessories. You feel the texture of the earth as well as the crisp vegetables that are picked for culinary enjoyment. You can smell the perfume of the flowers and trees. Tasting fresh produce from the garden is a bonanza for your taste buds. Finally, your sense of hearing is able to pick up the sound of the wind in a set of wind chimes. Wind chimes are decorative and can sound melodic or mournful, tinkling or hearty.
Plan your garden accessories to appeal to each, and every human sense and your garden will be a place where your spirit is uplifted.
Take a trip to your favorite local award-winning Lexington, SC garden center, Wingard’s Market for everything you need to make your garden have the best curb appeal of the neighborhood!
Here at Wingard’s Market, we specialize in providing outstanding customer service, offering professional gardening advice, and answers to your everyday gardening questions. Stop by and visit our Beautiful Gift Shoppe and Fresh Produce Market while you stroll under century-old pecan trees. It’s truly a Garden Wonderland!
Located at 1403 North Lake Drive in Lexington, SC. Call us at (803) 359-9091
One day it’s gloomy, bleak, and cold, and the next it’s warm and sunny. With the sunshine, you start thinking about spring gardening, but you didn’t prepare as you should have.
What do you do? It’s easy.
Spring gardening can be a fun and relaxing activity, especially if it’s done correctly. By following these simple tips, you will make the most out of spring gardening.
The first step to spring gardening is sharpening your tools. Start early and sharpen all your tools, such as shovels, hoes, and pruning shears, to a fine edge. We carry any easy to use sharpening tool in the Wingard’s Market Gift Shop. You may even want to splurge on buying a second, well-sharpened blade for your lawnmower. That way you will have a spare if the one currently on your lawnmower needs to be sharpened. A sharp mower blade is critical if you want to have a beautiful lawn. Dull blades can injure your grass and allow the disease to creep in, which can be costly in the long run to correct.
If you plan to put in a new lawn or plant bed, or if you had problems getting things to grow properly last year, you may want to get your soil tested. A soil test will tell you exactly what type of nutrients are needed to assure your yard looks the best it can. (We carry Clemson Extention Soil Test bags here at Wingard’s)
A helpful tip for spring gardening, especially if you need a little help getting your yard into shape, is using our landscape design services early, before the rush starts. The later in the season you call, the longer your wait time for an appointment.
Make arrangements early to buy sod or for sod delivery, if you plan to put in a new lawn. You should choose only moist rolls. Any that have dry roots or yellowed turf is no good.
Keeping a journal is a great way to keep track of plants during spring gardening. You can write down what was a success last year, what was a failure, and what plants should be moved with the change of seasons. It will prove not only useful this year but also next year when you may not remember all of the small details. Keeping informational plant tags comes in handy, when you want to replace or add more of a particular variety.
A definite must is throwing away any outdated chemicals. Follow the instructions on the label. Also, check to make sure those you are keeping are stored where children and pets cannot get to them.
Tilling the soil where you plan to begin your spring gardening is essential. Handfuls of the soil should easily crumble. Add soil amendments: Wingard’s Soil Conditioner for clay soil, and Wingard’s Premium Potting Mix for sandy soil. The additional composted organic matter will enrich your sandy soil, which is devoid of nutrients. At Wingard’s, we recommend Stout Ollie, a made- in South Carolina compost consisting of plant material from the cotton ginning process, fish trimmings from the Santee Cooper lakes and cow manure from the manufacturer’s own herd.
Lastly, while engaging in spring gardening, you have to remember to prune. Generally, you prune spring-blooming shrubs immediately after the flowers fade.
Now that you know what to do, your spring gardening won’t be so much of a chore, but more of a pleasure and a chance to get out and enjoy that spring sunshine.
———————————————–
Here at Wingard’s Market, we specialize in providing outstanding customer service, offering professional gardening advice, and answers to your everyday gardening questions. Stop by and visit our Beautiful Gift Shoppe and Fresh Produce Market while you stroll under century-old pecan trees. It’s truly a Garden Wonderland!
Located at 1403 North Lake Drive in Lexington, SC. Call us at (803) 359-9091
Don’t give up hope on them just yet! We have a list of tips and ideas to guide you through taking care of those plants that have been damaged by the cold snap we’ve experienced. Typically, temperatures falling below freezing will quickly damage or even kill many types of plants. However, with prompt care, many of these cold damaged plants can be rescued.
Here in the Midlands, the January cold snap, especially following the warm November and December have affected plants that are generally cold hardy.
Take a walk through your yard and look for these signs on your camellias, tea olives, hollies, and podocarpus:
If leaves that are typically green in the winter have turned brown, resist the temptation to “fix” them. Don’t do anything right now.
Wait until the weather warms up and then fertilize after April 1 with a general tree and shrub fertilizer.
Wait until after new growth appears to prune away dead branches.
Camellia buds may drop without opening into full flowers. There is nothing you can do about that. Next year protect your camellias with a blanket and Christmas tree lights if you want to preserve the buds during a hard freeze.
Sometimes plants such as azaleas, pittosporum, hollies, gardenias, and mimosa trees won’t make their damage seen until the heat kicks in about June.
If you see branches beginning to yellow and die out this summer, look closely at the bark on the dying branches. If you see that the bark has split, this is due to the sap freezing in January.
When the plant tries to function in the summer, it can’t get enough water and nutrients up its stems, so it dies back.
If the affected areas are just some of the limbs, you can cut out the dead material and let the plant recover.
If the primary trunk is affected, the plant may not survive.
Plants that are rated Zone 8 & higher such as lomandra breeze grass, oleander, bottle brush, lantana, and angel trumpets may have been severely damaged during the January freeze.
Fertilize with a general tree and shrub fertilizer after April 1.
Wait until the weather warms up and look for new growth pushing out. If you get new growth, the plant survived.
Cut back dead plant material and wait for the plant to recover through the summer.
If you don’t see new growth by June, dig it up, throw it away and plant a new one.
Sago Palms
If the cold got to your Zone 8+ Sago Palms, they may look particularly dead and unattractive right now. Don’t do anything.
Fertilize with a palm tree fertilizer after April 1. We recommend Carl Pool Palm Food. Or if you have had problems with scale on your Palms in the past, use Fertilome Palm Tree Food with Systemic Insecticide.
New growth will appear out of the center of the palm in late May early June.
Wait until after the new growth appears before you cut off the brown fronds.
How much cold will kill a plant is not an easy question to answer. Be sure to look up the cold hardiness for the plant in question before leaving the plant outside. Some plants can survive sub-freezing temperatures for months while others cannot take temperatures below 50 F. (10 C.) for more than a few hours.
Here in the Midlands, we are rated zone 8a. The average extreme minimum temperature for zone 8a is 10-15 degrees. Coastal SC is rated zone 8b. The average extreme minimum temperature for zone 8b is 15-20 degrees. If a plant is rated hardy for Zone 8-10, it should survive temperatures that fall as low as 10 degrees. However, we have found that some zone 8 plants are hardy to zone 8b but less so for 8a. In other words, they will survive 15-20 degree temps, but not less than 15-degree temps. Also, we have found that a plant might survive one night of 14-degree temp, but several nights in a row will do it in. Also, remember that if a plant is rated hardy for zones 8-10, it likes warmer weather since zone 10 is South Florida. Zone 8 is its northernmost border of survivability. So, a zone 8-10 plant would be potentially more susceptible to extreme cold than would a zone 7-9 plant.
While saving frozen plants is possible, freeze damage to plant tissue and other cold injuries can often be prevented. When frost or freezing conditions are expected, you can protect tender plants by covering them with sheets, burlap sacks, or “frost cloth.” These should be removed once the sun returns the following morning. It’s vital as a gardener you watch the weather forecast and protect your plants when needed.
———————————————–
Here at Wingard’s Market, we specialize in providing outstanding customer service, offering professional gardening advice, and answers to your everyday gardening questions. Stop by and visit our Beautiful Gift Shoppe and Fresh Produce Market while you stroll under century-old pecan trees. It’s truly a Garden Wonderland!
Located at 1403 North Lake Drive in Lexington, SC. Call us at (803) 359-9091
In beautiful shades of purple, pink and white, the continuous blooms of African violets will add bursts of color to your windowsill for years to come.
Many gardeners shy away from these little indoor tropical plants, but we’re here to tell you there is no need. With a bit of guidance and proper care, you can easily add them to your collection of houseplants.
As with any other plants, African violets need all of the necessary elements to stay healthy; light, water, soil, food, and air.
Here is a basic list of what these cheerful indoor plants need to stay healthy:
LIGHT: Adequate light is the most critical factor in promoting flowering. Place plants near any window that has bright, but filtered, light. An east window is best because it gets morning sun. A thin curtain will be necessary if placing plants in a south or west window. In order to develop a nice symmetrical form, plants must be turned 1/4 turn every week.
WATER: More violets die from over-watering than from any other single cause. Violet soil should be kept evenly moist and never allowed to become soggy. Water only when the top of the soil is dry to the touch. Always use tepid water. You can water from the top or bottom, use wicks, or use self-watering However, about once a month, plants should be watered from the top to flush out accumulated fertilizer salts. Never allow plants to stand in water and if water gets on the leaves, dry with a paper towel to prevent leaf spotting.
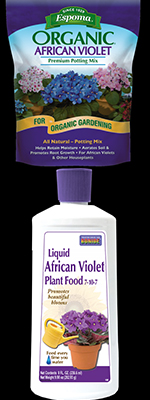
SOIL: A potting medium suitable for African violets should be sterilized, and light and airy to allow root penetration. Soil-less mixes are ideal – they contain sphagnum peat, vermiculite, and We recommend Espoma Organic African Violet Premium Potting Mix.
FOOD: Lack of regular feeding is one of the reasons an African violet will not bloom. The best way to feed is to use a dilute fertilizer solution every time you water. Use 1/8 to 1/4 tsp. of fertilizer to one gallon of water. A balanced fertilizer should be used, such as Bonide Liquid African Violet Plant Food 7-10-7. It is best to use a fertilizer with a low nitrogen urea content as urea burns the roots.
AIR: Temperature and humidity are important factors. Most violets can tolerate temperatures between 60 and 80 degrees. Ideal temperatures are 72-75 degrees day-time and 65 degrees night-time. The preferred humidity range is 40% to 60%. A humidifier or bowls of water placed near plants can be used to increase your home’s humidity during the heating season.
For continued care, African violets should be repotted once a year. They tend to like tight pots, so use a new pot that is only slightly larger than the old one. Remove one-third of the old soil and replace it with new and make sure the crown of the plant is just above the soil line and water thoroughly.
If taken care of, your new African violet will reward you with beautiful blooms all year long.
———————————————–
Here at Wingard’s Market, we specialize in providing outstanding customer service, offer professional gardening advice, and answers to your everyday gardening questions. Stop by and visit our Beautiful Gift Shoppe and Fresh Produce Market while you stroll under century-old pecan trees. It’s truly a Garden Wonderland!
Located at 1403 North Lake Drive in Lexington, SC. Call us at (803) 359-9091
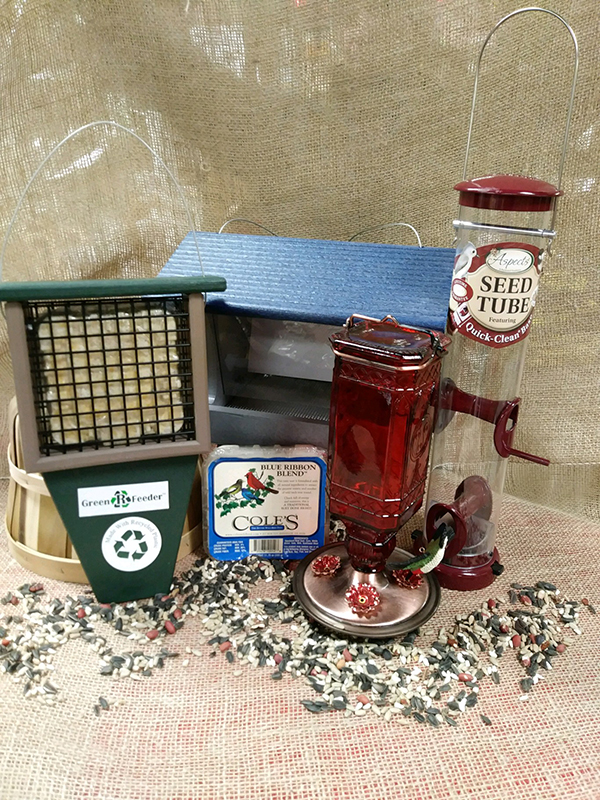
Bird feeders offer the best way to turn your own backyard into a mini oasis for the wild birds in your area. They’re usually filled with a variety of seeds to suit the different species of our feathered friends. The most popular types of seed include millet, safflower, sunflower, and thistle.
Apart from satisfying the hunger of birds, bird feeders also provide an excellent treat for your feathered friends. To everyone’s surprise, some birds you would never think of can be witnessed in our very own backyards. Bird feeders come in different varieties and design depending upon the species of bird they cater to. The most common types are hopper feeder, seed tube feeder, hummingbird feeder, suet feeder, and oriole feeders.
Seed feeders are very popular; they come either with tubes or hoppers. Mainly these feeders are laden with sunflower seeds to attract birds like chickadees, nuthatches, and finches.
A suet feeder comprises of a cage-like structure made of metal, coated with plastic. It is this plastic that contains a cake or suet. Suet is mainly a bird feed including animal fat, which prevents the feed from turning rancid and protects it from the adverse effects of moisture. Also, they could be hung from windows or any tree tops thus giving us a clear view of the birds in action. These bird feeders attract woodpeckers the best.
Unlike the seed feeders, Hummingbird feeders offer the feed in a liquid form. This usually consists of sugary syrup solution that is particularly preferred by hummingbirds. To attract the bird, the solution is painted in bright color. But care should be taken while choosing the coloring material, for often birds fall ill to harmful coloring agents.
Oriole feeders are orange in color. They too supply a liquid form of nourishment. They primarily cater to birds having a uniquely pointed beak and tongue. Apart from the quality of the feed provided in a feeder, the success of this feeder largely depends on its location and when its placed out of reach of intruders like squirrels and cats.
In spite of providing us hours of bird watching entertainment, feeders still do have their own negative impacts on the bird community. If the feeders are not kept clean, they can spread disease among birds as they come in contact with one another.
We encourage you to stop by Wings & Things and check out all the different varieties of bird feeders we carry. There’s no way better to enjoy your backyard then inviting an array of beautiful birds to dinner.
———————————————–
Here at Wingard’s Market, we specialize in providing outstanding customer service, offer professional gardening advice, and answers to your everyday gardening questions. Stop by and visit our Beautiful Gift Shoppe and Fresh Produce Market while you stroll under century-old pecan trees. It’s truly a Garden Wonderland!
Located at 1403 North Lake Drive in Lexington, SC. Call us at (803) 359-9091
Whether you garden indoors or out, a successful gardener needs to learn how to read plants.
It’s important for us to be able to understand the language of a plant and they make it easy for us to know when they’re feeling a bit under the weather. Both houseplants and landscape plants will show signs of yellowing leaves when they need some extra TLC (tender loving care.)
Even when their outward signs show us they need some attention, sometimes figuring out what they need is a mystery. There are a number of reasons a plant’s leaves will turn yellow. Among the reasons are overwatering, underwatering, stress caused by temperature changes, soil conditions, lack of proper nutrients, pests, disease, the age of the plant, pot-bound roots and transplant shock. Out of all of those contributing factors, overwatering or underwatering is usually the main culprit.
Here are the top 7 reasons for yellowing leaves:
Overwatering – Too much water is just as harmful as too little. Soil that doesn’t drain well will drown the roots. Without oxygen, the roots will die, and the leaves will turn yellow and fall off. Wait until the plant’s soil begins to dry, then water sufficiently and wait until the soil starts to dry out again before watering. Make sure your container has adequate drainage holes and water less frequently. When repotting an overwatered plant check its roots. Black roots indicate decomposition and a certain death sentence if not taken care of, while white roots are an indication of a healthy plant. When repotting a plant with black roots, trim back all the dark areas leaving only healthy white roots to recover. If there’s a green crusty appearance to the soil surface, this is algae, and it too is an additional symptom of overwatering.
Underwatering – If plants do not receive enough water they will drop their leaves to prevent dying. Often times it’s the way the plant is being watered that’s the problem. To encourage the roots to grow deep in the soil, water your plants less, but water them thoroughly to be sure the roots are getting plenty or moisture. Make sure you’re watering your plants properly: wait until the soil begins to dry, then water it fully, and wait until the soil starts to dry out before watering again.
Lack of Light – To determine if your yellow leaves are caused by a lack of light check the lower leaves first. If the lower leaves appear to be more faded than yellow, it could be a sign of a light deficiency. Plants need proper light for photosynthesis to occur. Be sure to rotate your pots periodically, so all foliage is exposed to sunlight. If the yellowing begins on the side away from your light source, it might be caused by too little light reaching these back leaves. Research your plants specific light requirements to be satisfied you are providing it what it needs to thrive. Some plants like indirect light, while others require full sun. Plants with too little light will often become leggy as they try to reach toward the light.
Temperature – Typically seen more in landscape plants than houseplants, a significant temperature change can leave the tips of your plants looking burned. Most often this occurs in the spring when tender new leaves are affected by a late freeze. If this happens, trim off the burned areas, and allow for new growth. With houseplants, most prefer particular temperature ranges. Some like it cool, around 50-60 F while others prefer in warm around 70-80 F. Some plants will drop their leaves when moved to a new location that has a significant temperature change. Tropical plants do not like colder temperatures, so keep them away from air-conditioner vents.
Pests – If the yellow spots on your leaves appear along with tiny critters (be sure to check the undersides of the leaves), then you have an insect problem. First, identify the pest and then treat for that particular insect. Typical bug infestations on plants are caused by one of the following: mites, aphids, mealybugs, thrips, scale, or whiteflies. Repeatedly washing the plants or applying an insecticidal or horticultural soap is one treatment that is often effective as well as environmentally safe.
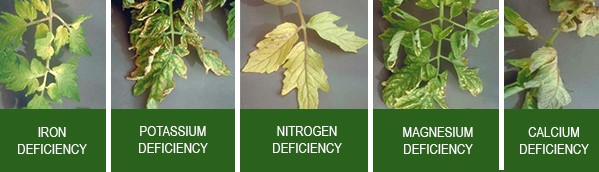
Nutrient Deficiencies – If the top leaves of your plant are yellowing, or there is an unusual pattern of yellowing (i.e. the veins remain dark while the tissue between them turns yellow), it’s most likely a nutrient deficiency.
Iron deficiency – This causes yellowing, stunted growth and interveinal chlorosis. You will see it normally in new growth first. Test your soil and maintain a pH below 7.
Potassium deficiency – The leaves, especially older leaves, may have brown spots, yellow edges, yellow veins or brown veins. Add a potassium fertilizer containing potash.
Nitrogen deficiency – This causes stunted growth and yellow edges on the tips of the leaves. The veins may be yellow, and sometimes the whole leaf will be pale yellow. Add used coffee grounds to the soil to increase its nitrogen, or apply a balanced fertilizer.
Magnesium deficiency – This causes yellowing of the leaves between the veins with the veins remaining green and usually appears on lower leaves first. Treat the plant’s soil with Epsom
Calcium deficiency – This will cause crinkled, mottled or distorted leaves and will not allow the tips of the leaves to grow. Add agricultural lime to the soil.
Old Age – Often a plant has just outlived its natural plant life, succumbing to yellowing leaves and aging-out.
Please note that whatever the cause of your plant’s illness, remember it may take weeks or even months for a plant to recover and return to normal growth.
———————————————–
Here at Wingard’s Market, we specialize in providing outstanding customer service, offer professional gardening advice, and answers to your everyday gardening questions. Stop by and visit our Beautiful Gift Shoppe and Fresh Produce Market while you stroll under century-old pecan trees. It’s truly a Garden Wonderland!
Located at 1403 North Lake Drive in Lexington, SC. Call us at (803) 359-9091
Delivery is only available for the 29072 and 29212 ZIP codes. Please call if you are outside of this area and we will quote the delivery rate over the phone.

 Although many gardeners plant trees and shrubs in the spring, knowledgeable gardeners plant in the fall to take advantage of all this fabulous season has to offer. But why is fall planting better than spring planting?
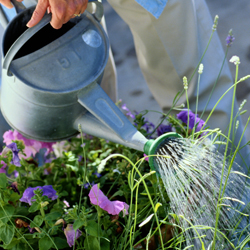
 Water is critical for a healthy garden and landscape, but how much water is too much, how much isn’t enough and how much is just right? Unfortunately, there isn’t a specific answer that suits every gardener’s needs. All plants have different water requirements, which change depending on the type of soil, amount of sun, temperature, humidity, season, maturity of the plant and overall growing environment.
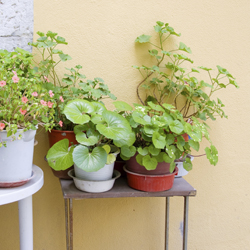
 You can bring the bright atmosphere of a tropical vacation into your home with indoor plants. An integral part of your home décor, indoor plants not only artistically improve your home, they also cleanse and freshen your indoor air quality. Plants take in carbon dioxide and release clean, pure oxygen. Some plants even absorb certain air toxins, potentially harmful radiation or unpleasant smells. Indoor plants also add welcome humidity to the air we breathe, and filter dust particles for a cleaner environment. While indoor plants can improve your life in many ways, they must be selected to fit successfully into your lifestyle.


 Take a walk through your yard and look for these signs on your camellias, tea olives, hollies, and podocarpus:
 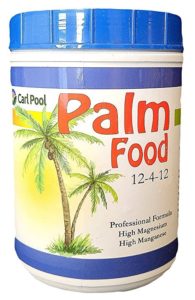 Sago Palms
 WATER: More violets die from over-watering than from any other single cause. Violet soil should be kept evenly moist and never allowed to become soggy. Water only when the top of the soil is dry to the touch. Always use tepid water. You can water from the top or bottom, use wicks, or use self-watering However, about once a month, plants should be watered from the top to flush out accumulated fertilizer salts. Never allow plants to stand in water and if water gets on the leaves, dry with a paper towel to prevent leaf spotting.